
 |
| Home • Reviews • Forums • News 2015 • 2013 • 2012 • 2009 • 2008 • 2007 • 2006 • 2005 • 2004 RSS Feeds • FOV Factor Table • Sensor Sizes | Definitions: A-D • E-H • I-L • M-P • Q-U • V-Z | Sitemap Articles • Archived Websites (Pre-DigitalDingus): D100 Lounge • E-10 Club | Contact |
| VIZO Uranus 3.5" One-Touch Backup Enclosure URA-350SA (using Western Digital 250GB 3.5" WD2500KS) |
|
| Installation Brief February 18, 2007 |
|
| Uranus URA-350SA: Introduction • Uranus URA-350SA: What's In The Box Uranus URA-350SA: A Closer Look • Uranus URA-350SA: Installation Brief Uranus URA-350SA: Benchmarks • Uranus URA-350SA: Specifications Uranus URA-350SA: Conclusion
|
|
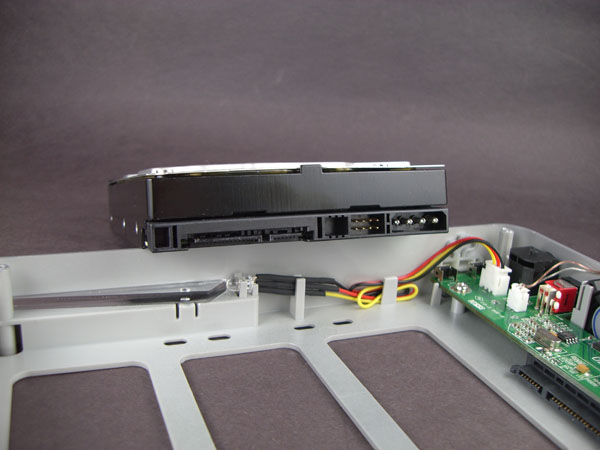
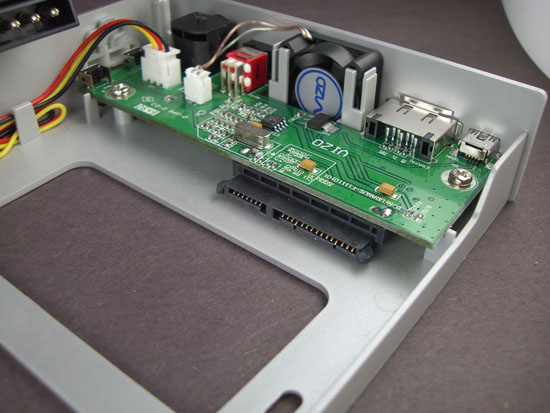
Using Existing Hard Drives You may not be successful when using a drive previously used in another computer. A variety of reasons exist, but one of the issues at the top of the list is the drive being used in a different physical location, which may confuse your Windows operating system. So, make sure you have a drive which can be formatted after being connected via USB or eSATA. The URA-350SA SATA Interface Below you can see the URA-350SA SATA interface, which connects directly to a SATA hard drive. In fact, the process went rather smoothly and I attached the Western Digital 250GB 16MB WD2500KS within a few seconds. VIZO designed the connectors to easily slide into place.
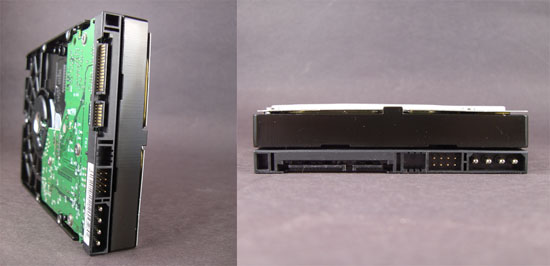
Just as a matter of information, the following is an image of the Western Digital 250GB 16MB Cache SATA drive which is being used within the URA-350SA enclosure.
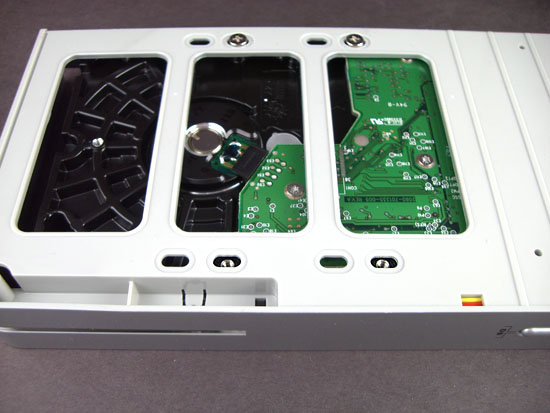
As mentioned above, joining the Western Digital 250GB (WD2500KS) and the URA-350SA took only a few moments. The hard drive snapped into place for a perfect fit.
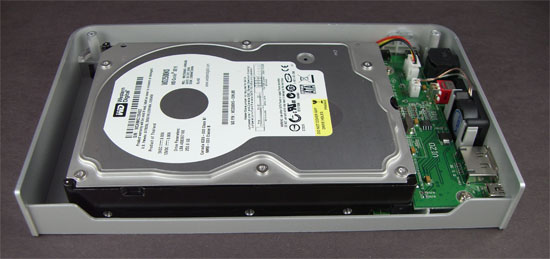
After joining the hard drive to the internal frame, it's easy to forget the frame has to be turned over, revealing 4 places to attach the drive firmly. I almost overlooked it myself so I decided to post the following.
|
|
| Home • Reviews • Forums • News 2015 • 2013 • 2012 • 2009 • 2008 • 2007 • 2006 • 2005 • 2004 RSS Feeds • FOV Factor Table • Sensor Sizes | Definitions: A-D • E-H • I-L • M-P • Q-U • V-Z | Sitemap Articles • Archived Websites (Pre-DigitalDingus): D100 Lounge • E-10 Club | Contact |